Build your simulations
If you haven’t yet read it, we recommend you first read the Quickstart page.
For a practical reference to the Builder API module methods, see the Builder Overview.
Creating a new simulation
In MORSE, we call a simulation environment a main simulation scenario (a
Python script that describe the environment, the static objects, the robots,
the sensors and/or actuators, etc.), and a set of optional resources, that
may comprise models (as Blender .blend files) and the
implementations of custom components.
These files are usually stored in a single self-contained folder (for ease of
sharing), but since regular Python’s import mechanism works as expected,
you can also organize your files differently (for instance, to share a
complex robot description between several simulation scenarios).
To get you started quickly, MORSE provides a special command:
$ morse create <simulation name>
For instance:
$ morse create my_project
creates a new folder called my_project in the current directory, and also
adds an entry to the MORSE configuration file (usually located in
$HOME/.morse/config) that allows you to run your simulation from anywhere,
with a simple morse run my_project.
my_project is your new simulation environment. The my_project/
folder contains one important file, default.py. This is a sample
simulation scenario (also called a Builder script). Open it to see how
it works.
my_project/scripts contains a sample client script that shows how to
connect to MORSE through Python. You can safely delete it if you do not need
it.
How to build a simulation scenario suitable to your needs? The rest of this
page explains MORSE’s Builder API. It is a set of components and methods
that lets you build a simulation scene.
Builder scripts
Simulation scenarios (or Builder scripts) rely on the Builder API to
define the components, environments and middlewares that are
used in the simulation. When running MORSE, the simulator interprets the
scripts to build the complete simulation as a Blender scene, configures the
components, and starts the Blender 3D Engine.
Since these scripts are regular Python scripts, you can easily create one function or class for each of your robots. This way, you can quickly reuse them in different contexts.
A basic builder script looks like this:
from morse.builder import *
# [...]
env = Environment('indoors-1/indoor-1', fastmode=False)
- The first line tells MORSE that this is a builder script.
- The second is a comment, it’s where you will add robots, sensors and actuators.
- Then we create an environment. The environment instance, here
env, allows you to tune some simulation parameters. Seemorse.builder.environmentfor a list of methods. If you set the optional parameterfastmodetoTrue, MORSE switches to a simpler rendering method (wireframe) which leads to much faster performance, but you can not use vision-based sensors like cameras in this mode.
Note
The Environment object must be the last thing created in the builder script.
If you edit this script in MORSE, you should see the 'indoors-1/indoor-1'
scene:
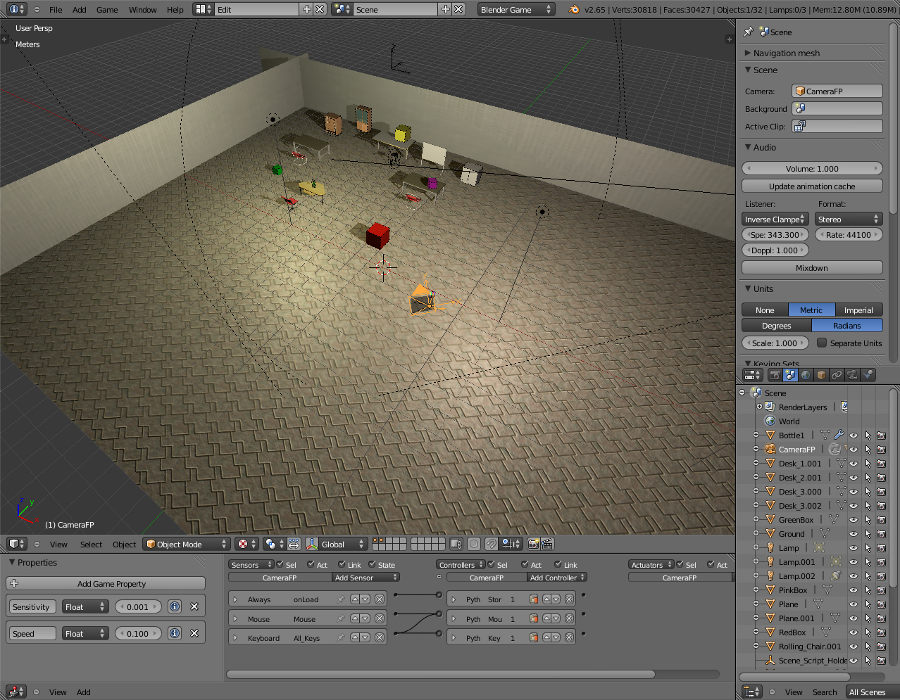
Since there is no robot yet, you won’t be able launch the simulation.
The environment comes from the file data/environments/indoors-1/indoor-1.blend,
you could also tell MORSE to load an environment from any location on your system
by adding the .blend extension. e.g., Environment('../my_house.blend') will
load the file my_house.blend in the parent directory of where you
are running morse.
You can also set a MORSE_RESOURCE_PATH environment variable with:
export MORSE_RESOURCE_PATH="/path/number/one:/path/number/two"
where MORSE will look for components. The default place MORSE looks is
$MORSE_ROOT/share/morse/data (typically /usr/local/share/morse/data)
An additional option is to place and aim the default camera, by using the methods
morse.builder.environment.Environment.set_camera_rotation() and
morse.builder.environment.Environment.set_camera_location().
env = Environment('land-1/trees')
env.set_camera_location([-5.0, 5.0, 3.0])
env.set_camera_rotation([1.0470, 0, -0.7854])
Note
You can also edit a builder script directly in MORSE, by calling morse edit my_builder_script.py.
This let you build your environment with Blender’s GUI. Save it as a regular Blender file, and
run it directly: morse run my_sim.blend. Be aware that MORSE does not support converting such a Blender
simulation back to a Python Builder script.
Adding a robot
Let’s add a robot to our scene:
from morse.builder import *

# Add an ATRV robot to the scene
robot = ATRV()

env = Environment('indoors-1/indoor-1')
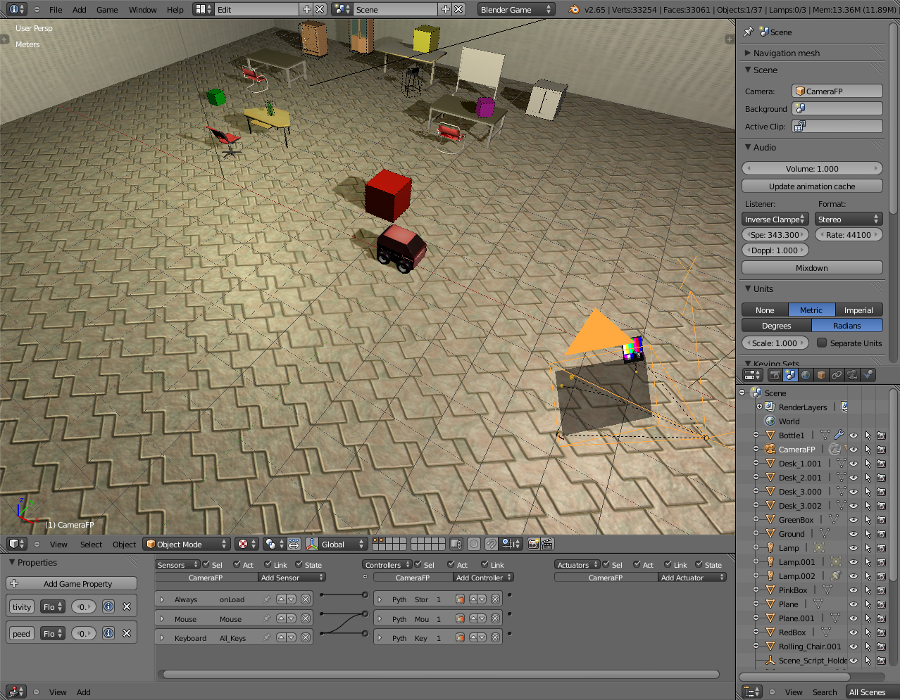
You should see the ATRV at the center of the scene.
Warning
Loop handling in builder scripts (e.g., to create multiple components), can be tricky. There are two possible solutions. The first is to explicitly name each robot, for example:
for i in range(1, 5):
    robot = ATRV('robot') # Or: robot = ATRV('robot' + str(i))
The second solution is to use the special method close_context such
as:
for i in range(1, 5):
    robot = ATRV()
    AbstractComponent.close_context()
Adding sensors and actuators
A robot needs to know about it’s location, and how it should move.
There are different ways to achieve this, in our example, we will use a Pose
sensor and a Motion controller ‘v-omega’.
from morse.builder import *

# Add an ATRV robot to the scene
robot = ATRV()

# Append an actuator to the robot
motion = MotionVW()
robot.append(motion)

# Append a sensor to the robot
pose = Pose()
pose.translate(z = 0.75)
robot.append(pose)

# Configure the robot on the 'socket' interface
robot.add_default_interface('socket')

env = Environment('indoors-1/indoor-1')
The add_default_interface method is used to configure the robot’s
components on sockets; for more information about services and
datastreams, see Middleware configuration
Note
In this example, the motion controller in your simulation will be called
motion.
The name is used by MORSE to refer to the component in the simulator
interface. Each middleware has it’s own naming convention, but for
instance with the basic socket interface, you can send a command to
the motion controller like that:
$ telnet localhost 4000
Connected to localhost.
> req1 motion set_speed [1.0, 0.002]
req1 OK
Position a component
There are two transformations you can apply to a component: translate(x, y, z)
and rotate(x, y, z).
- The translation will add (x, y, z) to the current object location (default: x=0, y=0, z=0, unit: meter).
- The rotation is a euler rotation relative to the object’s center (default: x=0, y=0, z=0, unit: radian).
motion.translate(x=.2, z=1)
atrv.rotate(z=3.14)
Component Naming
You can set the name of a component using the name setter:
mouse = ATRV()
mouse.name = "jerry"
If you do not explicitly set the name of a component, MORSE will name it automatically (including the Blender objects representing your components) based on the name of the variable used in your Builder script.
In all cases, the components’ names are automatically prefixed with their parents, to avoid name collision.
Let’s take an example. Consider this script, with two robots:
from morse.builder import *

tom = ATRV()
lefteye = VideoCamera()
ptu = PTU()
righteye = VideoCamera()
righteye.name = "blindeye"

tom.append(lefteye)
ptu.append(righteye)
tom.append(ptu)

mouse = ATRV()
mouse.name = "jerry"
cam = VideoCamera()
mouse.append(cam)

env = Environment('indoors-1/indoor-1')
If you open this in MORSE for editing (with morse edit) and look at the
outliner, you will see that the hierarchy of objects looks like this:
tom
 |-> tom.lefteye
 |-> tom.ptu
    |-> tom.ptu.blindeye
jerry
 |-> jerry.cam
tom comes from the variable name, whereas jerry was manually set
using the name setter.
Note
Automatic renaming only works for components visible from your script or
components that were appended to a component which is visible.
(So, a component declared in a function or class, which is not assigned to
a variable that belongs to your Builder script, will not be renamed.)
Note
The renaming process works only for objects created before the Environment object. Make sure to create the Environment at the very end.
Note
If name collisions occur anyway, Blender automatically adds an incremental
suffix like .001, .002, etc.
Note
You can switch off automatic renaming through the Environment object like this:
env = Environment('indoors-1/indoor-1', component_renaming = False)
If you want to pymorse to work properly without automatic renaming, you must specify names using the pattern <robot>.<object>
Component properties
You can modify the game-properties of any components within Python (or even add new properties). The documentation for each component lists the game properties it uses, their types and how they affect how the component functions.
For example, to change the resolution of the images captured by a video camera sensor, modify its properties like this:
camera = VideoCamera()
camera.properties(cam_width = 128, cam_height = 128)
Note
You can also add properties this way: if you refer to a property that does not exist, the property is created, and becomes available in other MORSE scripts.
Middleware configuration
Datastream handlers
For standard sensors and actuators, configuring a middleware to access the component is as easy as:
motion.add_stream('ros')
One component can be made accessible through several middlewares by simply
calling add_stream again:
motion.add_stream('yarp')
You can check which sensors and actuators are supported by which middleware in the compatibility matrix.
Note
Sometimes, you will need to use a specific serialization method.
This can be achieved by passing more parameters to add_stream:
motion.add_stream('ros', 'morse.middleware.ros.motion_vw.TwistReader')
In this case, we have told MORSE to use ROS with the TwistReader class
defined in the morse.middleware.ros.motion_vw module.
Note
Configurations for standard sensors and actuators are defined in
the morse.builder.data module.
Note
Some middleware allows you to configure the behaviour of each stream. Refer to the documentation of your specific middleware, in the part “Configuration specificities” to learn more about this.
Service handlers
To use a sensor or actuator’s services, you
should configure your builder script explicitly. For example, to export the
service of the actuator motion through the middleware socket, you must
write:
motion.add_service('socket')
As for datastream handlers, it is possible to configure one component to export
its services through multiple middlewares. You simply need to call
add_service once for each middleware you want to use.
Warning
Due the nature of some middlewares (in particular ROS or pocolibs), it is
sometimes not really useful to call the service directly as exposed by
Morse. You need to use an extra layer of adaptation called overlays and configure it through the add_overlay method.
Adding modifiers
Sensors’ and actuators’ data can be modified by assigning modifiers to them. Modifiers are used to either make some convenient conversions, for instance when you need to export data related to another frame than the Blender one (see the UTM or NED modifiers), or when you want to add noise to your data.
Modifiers may have parameters (like conversion frame reference, or noise parameters). They are described in the modifiers documentation.
To modify the data of a component, use the alter method. For
example:
pose.alter('Noise', pos_std=0.3)
Adding a zone
A zone is a 3D zone, more precisely a rectangular parallelepiped. It is possible to attach specific properties to each zone, in particular its name and its type. In the simulator, different behaviours can be implemented. At the moment, the only Morse component using the zone concept is the battery.
To add a zone of type Charging to a scenario, just add the following lines
to your builder script:
charging_zone_1 = Zone(type = 'Charging')
# Change its size and move it around (10.0, 0.0, 2.0)
charging_zone_1.size = [5.0, 5.0, 5.0]
charging_zone_1.translate(x = 10.0, z = 2.0)
Configuring time in Morse
Time management in simulations is a complex matter: you may want to simulate different sensors at different speeds, you may want to run faster-than-real-time simulations, you may want to synchronize the simulator with an external time reference, etc.
MORSE tries hard to make easy things easy, and complex scenarios possible.
Consider the following simple example:
from morse.builder import *

# Add an ATRV robot to the scene
robot = ATRV()

# Append an actuator
motion = MotionVW()
robot.append(motion)

# Append a sensor
pose = Pose()
pose.translate(z = 0.75)
pose.frequency(200)
robot.append(pose)

# Configure the robot on the 'socket' interface
robot.add_default_interface('socket')

env = Environment('indoors-1/indoor-1')
This is the typical scenario: we tell MORSE that the pose sensor should output values at 200Hz, and we let MORSE manage all other time-related questions. In this case, MORSE will run its main loop at 200Hz (hardware permitting! otherwise, MORSE will warn you that the desired frequency cannot be reached), and will attempt to update the physics at real-time speed. Note that we did not have to specify a frequency for our motion actuator: by default, all MORSE components run at 60Hz.
Now, imagine you want to accelerate your simulation. Just add the following lines to your builder script:
# [...]
env = Environment('indoors-1/indoor-1')
env.set_time_scale(1.5)
Now, MORSE will attempt (again, hardware permitting!) to run the simulation at 1.5x real-time. This means that, during one real-time second, Morse will simulate 1.5 seconds. Accordingly, the pose sensor, for instance, will produce readings at 1.5 x 200 = 300Hz, and the physics engine will run 1.5x faster, etc.
If you note that sensors do not publish data at a really stable rate, you can enable morse_sync. This may lead to some graphical frame lose, but it will improve the stability of the sensor rate.
...
env.use_internal_syncer()
Handling more complex scenarios
To handle more complex scenarios, you should read this page which describes Morse’s time handling. Below, we will review two advanced scenarios. If you have specific requirements, or the default settings cause issues on your computer, please report the issue to the Morse project.
Synchronisation with other simulators
In this situation, you want to use the Fixed Simulation Step strategy with
a well-defined base_frequency. v-sync can be turned off.
...

env = Env(...)
env.simulator_frequency(100)
env.use_vsync('OFF')
env.set_time_strategy(FixedSimulationStep)
# in this example, we use HLA, a middleware that is designed to support
# synchronization amongst heterogeneous systems.
env.configure_stream_manager('hla', time_sync = True)
Accelerating the simulation by a large factor
If you want to accelerate time by a factor of, say, 20, it would
probably be difficult (depending your hardware) to provide data at 1200
Hz (i.e., 60 Hz x 20). You may want to lower the frequency of the
different components, and reduce your simulation’s base_frequency.
As in the default case, you will want to disable v-sync and enable
morse_sync.
robot = Morsy()
robot.frequency(3)

pose = Pose()
robot.append(pose)
pose.frequency()

env = Env(...)
env.simulator_frequency(3)
env.set_time_scale(20)
env.use_vsync('OFF')
env.use_internal_syncer()